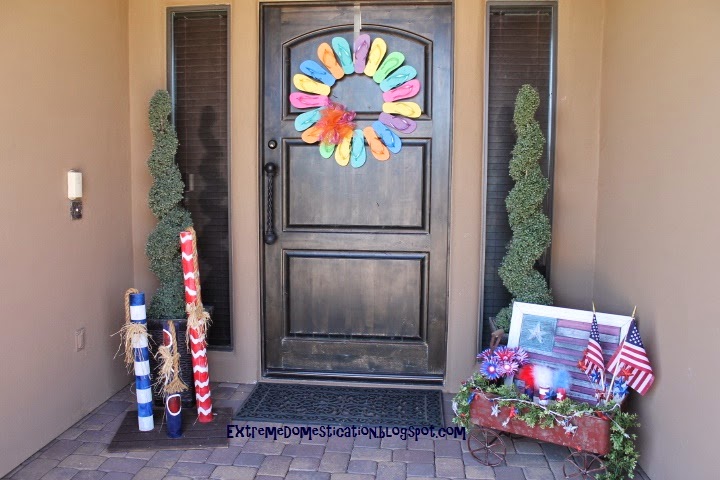
Note to self: do not do this craft outside in July in Arizona. Besides my heat stroke, I had a fun time making this "dynamite" yard decor. Ever notice how outside decorations are so small (besides the big blow up figures)?? The scale of this project is quite large, so it will surely be noticed from people driving by!
You will need:
8 foot fence post from Home Depot (and a husband to cut it)
5 feet of thick rope (Home Depot)
Red, white, blue, brown, and clear spray paint
painter's tape or Cricut to create design
wood glue
a drill with 3" wood bit
3" screws
plywood
raffia or ribbon
1. Cut 8 foot post to 3.5, 2.5, and 2 feet sections. It would help if your husband could temporarily drill the posts upright into the plywood or else you will be holding them and trying to paint at the same time.
2. Figure out the design you want and start taping. I did stripes for one post, Chevron for another, and polka dot for the last. For the stripes, paint the whole thing white, tape with painter's tape, then paint with blue. For the Chevron, I painted the whole thing white. Then I cut out several zig zag strips (came with the cartridge that comes with the Cricut) and taped those to the post, then paint in between with red. For the polka dots, I painted the whole thing blue. Then I cut out a big circle and used the surrounding paper for my polka dot stencil. I free-handed a white border to make the red stand out against the blue.
3. Have your husband drill a 1-2 inch deep hole into the top of the posts. Squirt some wood glue in there and stick in your rope. I heavily frayed the ends of the rope that are hanging down to look like the dynamite is lit.
4. Cut out a 2x2 foot plywood piece for the stand and paint it brown. Use 3 inch screws to screw them into the base from underneath. Tie some raffia or ribbon around them and you are done!





.JPG)
.JPG)
.JPG)
.JPG)
.JPG)
.JPG)
.JPG)

.JPG)
.JPG)
