Friday, July 15, 2011

Lollipop Centerpiece


As I was playing Candyland with my daughter, I noticed how all the bright yummy colors really popped off the game board. I found inspiration for this craft in a simple activity. My daughter loved helping me with this one, but it was harder to keep the Skittles around.....


This Lollipop centerpiece can be used at a birthday party, summer barbecue, set on an entry table, or simply to add some color to your counter top. There are edible parts so it is a favorite for the kids.

You will need:

colored paper

glitter

Elmer's glue

small round tin (from Target $1 bins or the $1 store)

Popsicle sticks

glittery floral sprigs

Skittles

2 bouquets of Blow Pops (from Dollar Tree)

Cricut or die cutter


Use your Cricut or die cutter to cut three circles. I did a two 4" and four 3" circles. Or you could trace around a can and cut them out if you cannot get to a Cricut or die cutter.

Add Elmer's Glue to each of the circles. I did a peppermint type design on one and a swirl on the others.


Add your glitter, let dry


Glue two circles together, sandwiching the Popsicle stick in between


Pour Skittles into the tin. This will help everything stay up in the tin.

Add your sprigs

Cut the plastic off the top of the Blow Pops, keeping them together though (don't cut the portion that bands them)

Stick the Blow Pops in the tin next


Add your paper lollipops and you're done! (mine lasted about 5 minutes before suckers started to disappear) :)The addition of colorful napkins and plates will make your table pop with color.


Sunday, July 10, 2011

Cheeseburger Puffs


These Cheeseburger Puffs are a delicious and easy appetizer to make. You can add a variety of mix-ins to suit your taste. I used a couple of ingredients.


You will need:


1 lb. beef


2 cans crescent rolls


1/2 cup shredded cheese


2 T mayo


1 egg

salt and pepper to taste


ketchup or ranch for dipping


Brown your ground beef and chopped onions, drain. Mix in mayo, cheese, salt, pepper, and egg.


Slice each can of crescent rolls into 24 squares


Press squares into mini muffin pan. Add filling. I sprinkled extra cheese on top


Bake 12-14 minutes at 350 degrees F until golden brown


Dip into ketchup or ranch and enjoy!


Monday, June 27, 2011

Fabulous Drapes


I've been redoing my den lately and I am so excited at what it is becoming. Before we had a large straight couch hiding our pretty curved wall of windows so I am having fun accenting the windows now. I am doing a black and white theme of all different patterns. Pick 3 or so pattern you like to decorate your room, adding solid color at specific points to break it up.


Drapes can be so expensive, yet fabric add so much warmth to a room. Sewing your own drapes saves tons of money! Even a beginner can sew drapes because they are just large rectangles.


I have 12 foot ceilings and I wanted to sew 6 panels of drapes for 5 tall, skinny, and closely spaced windows. Putting the drapes up against the ceiling will highlight their height.


You will need:


-For six 12 foot panels: 18 yards of patterned fabric and 6 yards of plain fabric to sew at the bottom to break up the pattern a little.


-You will also need 2 x6 wood


-a table saw


-3 inch long bolts (3/8 diameter)


-drill


-staple gun


Optional: someone to operate all of these tools!


1. Sew, sew, sew. This project took me 6 hours of sewing, but it is easy work since all you are sewing is seems. Do not sew the top that will be against the ceiling (it will save time)


2. I cut the wood into six 18 inch pieces because the distance between my windows was only six inches. You want the curtains to slightly overlap your windows, but not too much.


3. Hand gather and staple gun the fabric on the top of the wood so that when you screw the wood pieces into the ceiling, the ends will be hidden. I did a basic EVEN accordion fold and stapled every inch or so. (sorry I don't have pictures of this part!). I found the middle of my fabric and stapled that to the middle of the wood and worked outward on each side in order to try to get the fabric spaced right. Don't forget to curve and gather around the ends (sides).


4. Have your husband drill the bolts underneath the wood up into the ceiling. The two inch side of the wood should be touching the wall, the six inch side should be touching the ceiling. Doing it this way will add more dimension. Make sure he finds a stud or uses reinforcements. My hubby used 2 bolts per panel.


5. Tie your drapes at a certain point in order to prevent them from spreading out too far. I used plain black ribbon.


Saturday, June 18, 2011

July 4th Outdoor Decor

It is that time of year to celebrate our great country, the U.S.A. Below are some simple outdoor hanging streamers that you can add to some posts or hang from furniture. (Don't mind my son in the background :) )

I bought ribbon, sparkly garland, hanging stars, and a sparkly boa at the $1 store. You will need wire and scissors also

Start making bows by criss-crossing the ribbon over a piece of wire, taking care to keep the design side of the ribbon facing outward.


Secure the bow with wire and fluff until you like the look. Attach to your boa ( I cut mine in half for my two posts). You will need to reinforce your boa with a long piece of wire down its entire length. I made three bows of differing ribbon and attached them evenly spaced to the boa.


I made the topper out of a bow of white tulle and a bow of sparkly garland tied together. It looks best messy, so don't worry about making it perfect.


When you secure the topper with wire, leave a long piece to tie around your posts.


Here is a completed garland. You can't see it, but I wrapped a very long piece of wire around the entire post to keep the bottom of the boa in place. If you don't it will blow in the wind and get messed up.


Have a safe and happy 4th!


Saturday, May 28, 2011

Restored Console

I just scored this gorgeous console table from Juniper's Loft. She is located in Mesa, AZ and she restores and re-purposes furniture and home accents from her home. You can check out her blog: Http://junipersloft.blogspot.com. Her prices are very reasonable and the piece itself is of top quality! It is solid oak painted black and then sanded at the edges to reveal the underlying color. The piece made a great addition to our den.


Tuesday, May 10, 2011

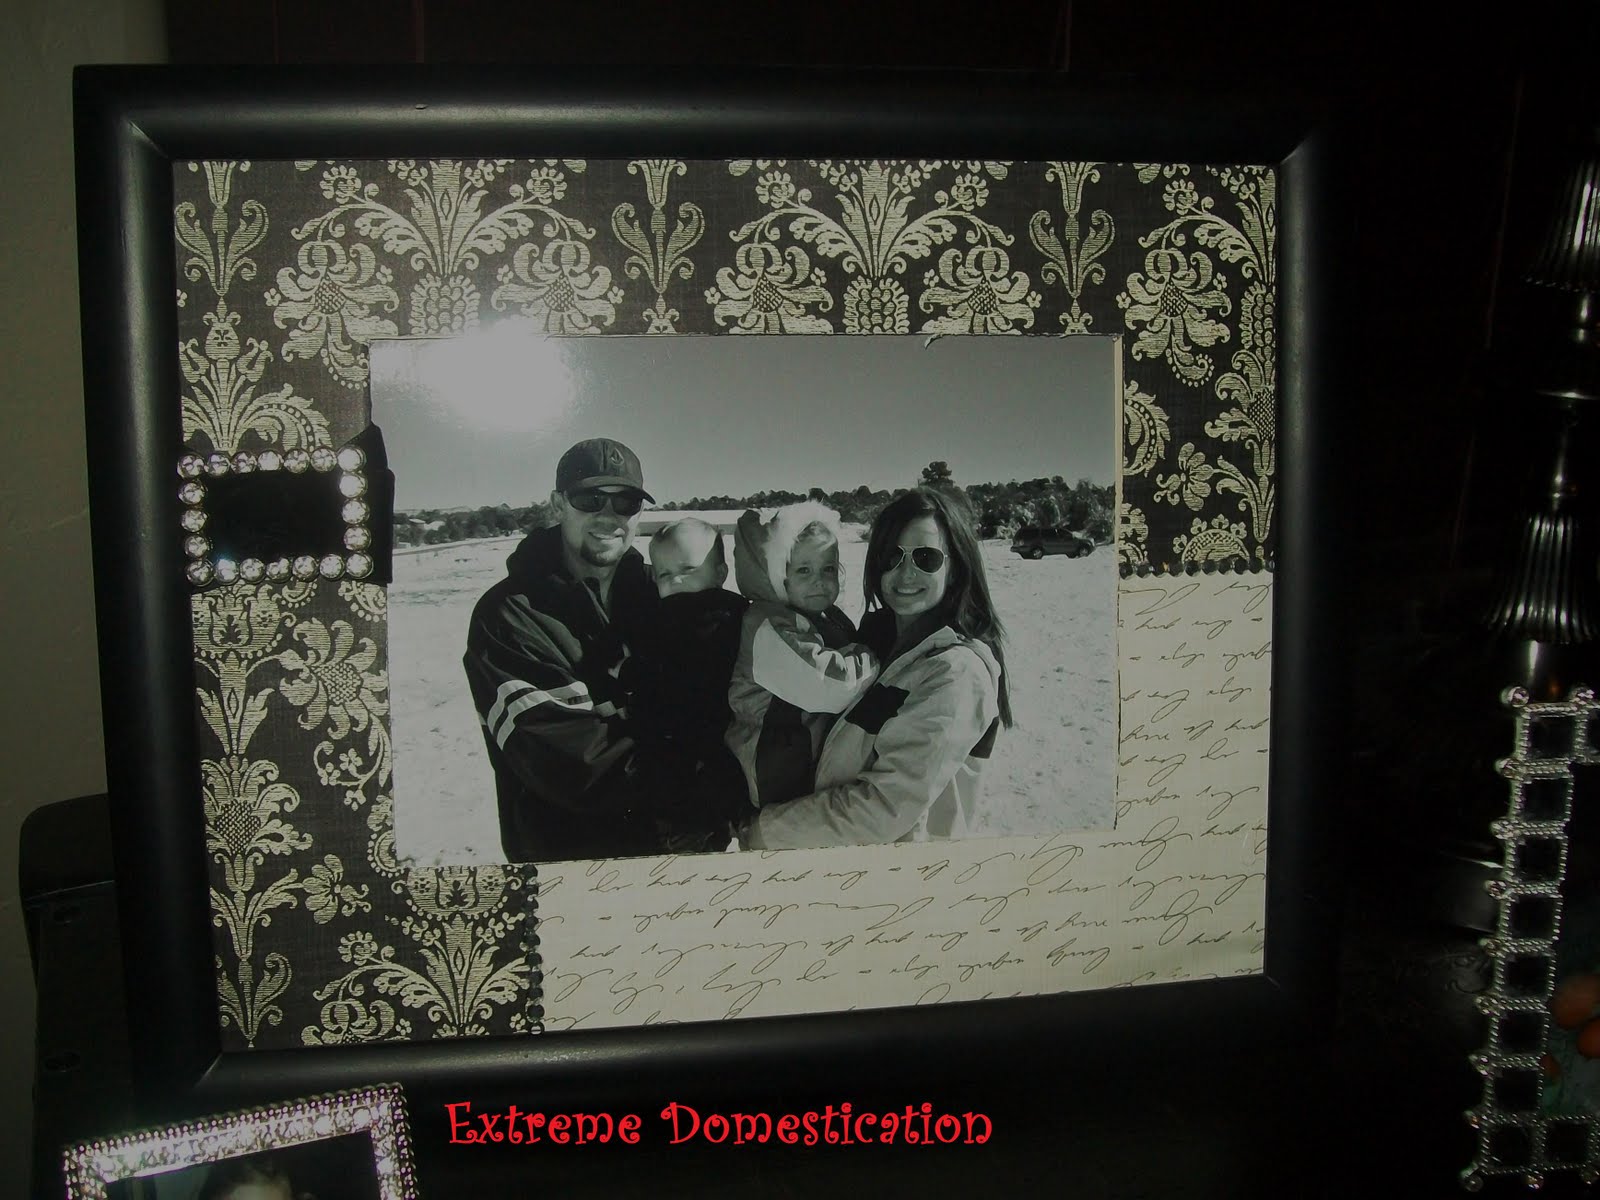
Fancy Frame

I am re-doing my den in black and off white and decided to dress up an old frame. This project was so quick and easy. You will need a frame with matting, scrapbook paper, scissors, paper cutter, adhesive, decorative buckle, rhinestones, and ribbon. Start by removing the glass and taking apart the matting


I choses 2 black and creme printed papers that did not match, but coordinated


Trace the matting on the back of both scrapbook papers.


Carefully cut your paper frames out


Cut the two frames in half but not right in the center. Cut at the left of the bottom and the right of the top of only one frame.


Layer the cut piece over the full piece and secure with adhesive.


I used Monoadhesive to secure frames all around and to the cardboard matting itself.


Add a sparkly buckle or other embellishment the one side of the frame


Glue rhinestones ov3er the seams where you cut the paper frames. These are Swarovski crystals in "Comet"


Put the franme together minus the glass and you have your finished project.


I added other crystal frames around the focal frame for some sparkle.


Related Posts with Thumbnails