Showing posts with label Halloween. Show all posts

Sunday, October 6, 2013

Halloween Outdoor Curtains & Halloween Wreath

I am obsessed with outdoor curtains lately! I wanted some spooky striped Halloween curtains for my front porch. I was shopping for cheap fabric when I had an amazingly cheap idea! These curtains were only $8 to make! I bought 4 black rectangular table clothes and 4 white rectangular clothes. I stitched 2 black and 2 white together using my sewing machine (I am sure you can use glue as well if you do not sew). They look super cute without being super expensive, and since they are plastic, they can hold up against the rain. 


Here is the wreath I made to match my black, white, and orange Halloween color theme. I used tulle (2 spools each color) and the largest green wire wreath I could find. It is made by cutting 12 inch strips and tying them on with knots. I also used orange netting and a spider for the bow.


Happy Halloween!

Friday, October 4, 2013

Halloween Coloring Pages

Happy October break! The kids and I are coloring today and I was sick of the coloring pages I found online because we colored the same ones last year. SO I attempted to draw my own! They are by no means a masterpiece, but we had fun with them.


Monday, October 15, 2012

Spooky Juice Boxes

I saw these adorable ghost/mummy juice boxes on Pinterest, but all I had was black duct tape so I figured I would make a bat!
You will need:
duct tape ($1 store has them)
 juice boxes
 scissors
 hot glue
 googly eyes.($1 store) 
 1. Wrap your juice boxes in tape. I never cut my tape until it was all the way wrapped. For the top, make sure you cut out a squarewhere the strawgoes
 2. The wings were tricky. I tried many different ways and the best way was to fold a long piece in half, cut in in the shape of the wings, then tape it on the box. Cut out some teeth, then glue on your eyes and straw on the backside.
 
 Here is my finished bat and ghost/mummy. I put these in my daughter's lunch along with a sandwich cut with a ghost cookie cutter. She loved it!

Thursday, October 11, 2012

All decorated for Halloween!

Here is my 2012 Halloween entry table display. The small skull, spooky gauze, spider web filling and ribbow around the lamp shades were all from teh $1 store. The large skull from Target
 I used some plastic cups to elevate my skulls


Happy Halloween!

Halloween Yard Display

All decorated for Halloween! How about you? As I was shopping I realized that Halloween decorations have become so expensive. My daughter wanted some ghosts in the yard, so I wrapped my scarecrows in christmas lights and covered my them with an old white t-shirt and some "spooky gauze," which you can buy at the dollar store. I cut out black eyes with felt.


My finished ghosts. Cheap and easy and after Halloween I can simply "undress" them to create my Thanksgiving/fall display

Sunday, September 30, 2012

Free Halloween Printable

I found this cute printable online. This would look great hanging over a mantle on on a side table. Select the largest size, save to computer, upload to walmart.com or other photo printing service and have it shipped to your home. Or you can print on card stock on an 8.5x11 paper. I bought the frame, mat, and feather boas (2 mini ones tied together) from Hobby Lobby. You can also pull in decor from around your home. I just happen to have a black and white decorated room, so I added 2 canisters from that room. I also removed my candles from my candle holders that are always there and placed some pumpkins on top.
 This piece is actually a frame from my B&W room. I made the decoration out of cardstock. Accordian fold some paper to make two discs, then glue down. Cover up the center with another piece of paper and add some sparkly letters. Tie a ribbon on the top finial and you are done.
The other framed pieces are a handprint spider from my daughter and feet ghost from my son. This is a great way to incorporate sentimental pieces.
http://www.flickr.com/photos/77760688@N08/7015923645/sizes/k/in/photostream/

Friday, October 7, 2011

Red Velvet Ghost Truffles

I recently had some really yummy truffles and I started thinking about other combinations I could make. Because I am obsessed with red velvet lately. I decided to make some delicious red velvet truffle ghosts for Halloween. They are so easy to make with only three ingredients and no baking.


You will need: red velvet cake mix, 1 block of cream cheese (8 oz.), and candy making chocolate in vanilla, wax paper for cooling

1. Make red velvet cake as directed


2. Bake cake and cool completely

3. Pull apart the whole cake and put in a mixing bowl with the softened block of cream cheese (only a small piece of cake pictured here)

4. Your final mixture will feel like a really moist play-doh.


5. Form cake mixture into 1 inch balls. Start melting your chocolate in the microwave

6. Dip each ball into the melted chocolate and place on wax paper.

7. Put truffles into freezer overnight to harden

8. You are left with some simple, yummy truffles perfect for parties


I added some ghost faces with regular candy making chocolate to create cute little ghosts
Happy Halloween 2011!

Thursday, December 2, 2010

Scrap Those Fall Memories!

It's so easy to get behind on preserving memories of fall family traditions and holidays. These are actually pages from a few years ago from my daughter's book, but some ideas none the less.
The Halloween web overlay I found was so cool! Since it is clear you can put it over any color paper. A ribbon and some letters are all you need to embellish it.
We visit a local farm every year called Schnepf Farms. I love going there and getting the pumpkin patch pictures. I never get sick of seeing my kids frolic around through the pumpkins.
I loved this button idea the moment I saw it! I decided to make a leaf and a pumpkin. It gives the page a lot of texture and color. JoAnn usually sells packets of buttons in the same color family. I printed the Schnepf logo from their website. Then I just drew a leaf on paper and cut it out. Glue the buttons on and attach to the page.
My favorite part is the pumpkin! The surrounding pictures are actually cut out from the pamphlet that the farm hands out.

Saturday, October 30, 2010

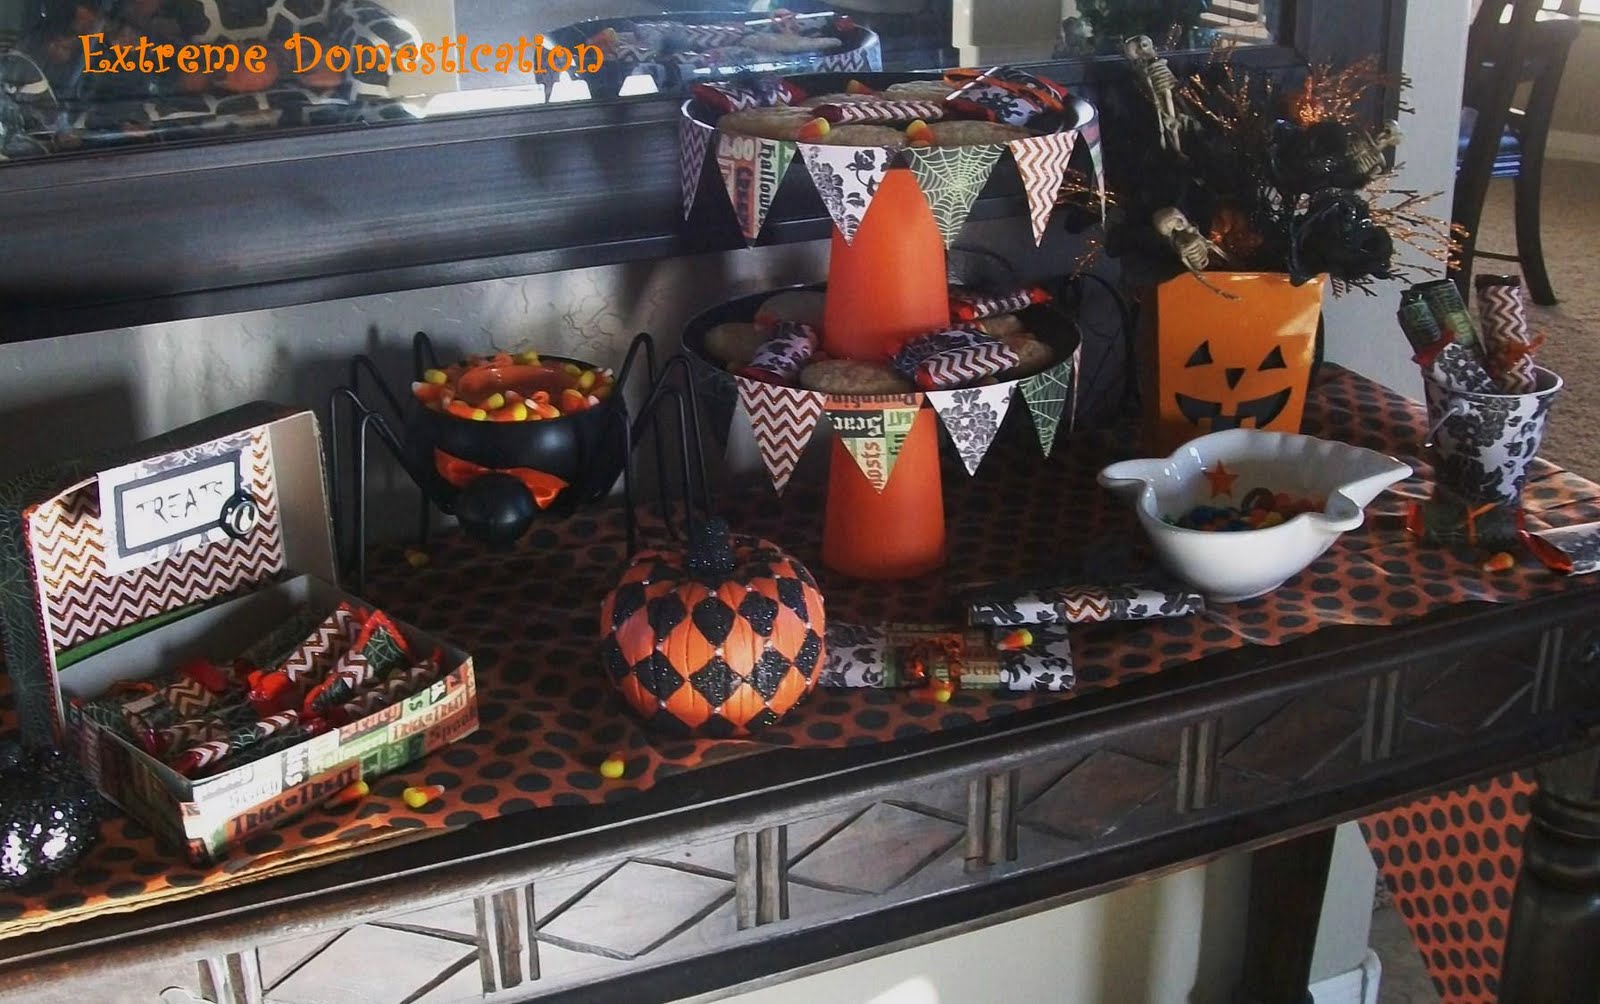
Halloween Table Party Display

Here is a display for a Halloween party. I am sure you can add adorable cupcakes or other spooky treats. Fancy food is not my best skill!

You will need a table runner, gift box, scrapbook paper, candy, tin buckets, pumpkins, ribbon, hot glue, scissors, and anything else you want to set on the table.
Happy Halloween!

This is a gift box wrapped in scrapbook paper and filled with candy bars wrapped in coordinating papers. I made the sign on my computer.


The cake stand consists of a plastic plate and cup glued together (see a previous post on how to do this). For this stand I added scrapbook paper cut into triangles around the edges and sequin string around the bottoms. Hot glue works great.


Wrap a tin bucket or aluminum can in the scrapbook paper and add you favorite candy bars wrapped in scrapbook paper and ribbon as well.


I got this spider from Target and filled it with a candkle and candy corn


Related Posts with Thumbnails