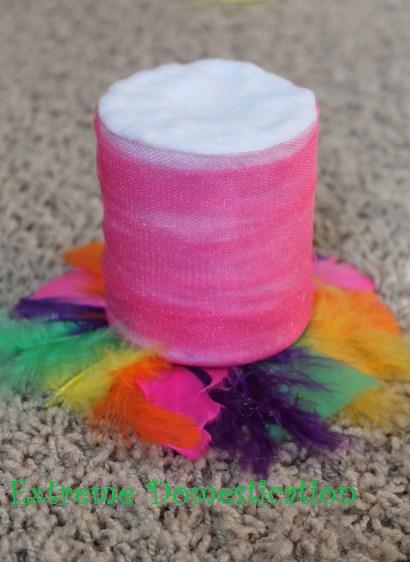
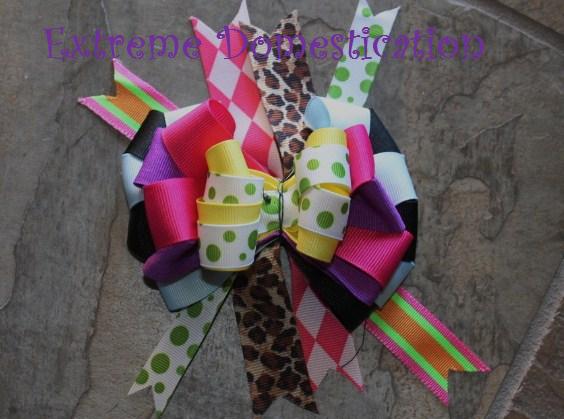
My sweet little girl is turning 5 in March and because I got an awesome new Canon camera for Christmas, I wanted to try my hand at photographing her. She is obsessed with rainbows right now, so I put together a rainbow outfit. The dress came from The Lucky Princess. Adding a mini top hat makes a cute photo prop and accessory. The bow is removable. You can also use it for a costume or just for your little girl to play dress-up with. I used tomato cans for the main
structure of the hat, so your husband will get a pot of chili out of the deal also!
You will need:
8 oz. can tomato sauce, emptied and rinsed
32 oz. tomato can lid, rinsed
1 piece of flexible felt, any color
Tulle
Feathers
Ribbon
wire
scissors
hot glue
Elmer's Glue
needle and thread
a rhinestone for the bow
a clip for the bow
glitter
3/8" or 1/2" elastic

1. Cut a square of felt and hot glue it around your lid. Be careful not to cut your fingers!


2. Cut a strip of felt for the can and hot glue.

3. I only glued the edges to the can so the glue wouldn't show through.

4. Glue the ends up under the can

5. Glue the ends up over the top.

6. Trace the outline of the can on the felt with pencil.

7. Cut out your circle

8. Hot glue your circle to the top of the "hat"

9. Start gluing your feathers around the top of the brim of the hat (lid). Overlap the feathers over the edge a little.

10. Wrap your tulle around the hat, gluing the ends

11. Glue the base to the top of the hat

12. Now it is time to make your bow. I used 9 different ribbons. Create three "x" shaped bows, the largest bottom bow you can do 6
total loops (3 per side). Stitch the center of each bow with a needle and thread.

13. Cut 4 ribbon strips that will be attached under the bow for extra detail.

14. Layer the stacked bows on top of the ribbon strips. Stick a piece of wire under the entire bow. I used floral wire.

15. Twist the wire under the bow tightly.

16. Stick a clip under the wire and glue.
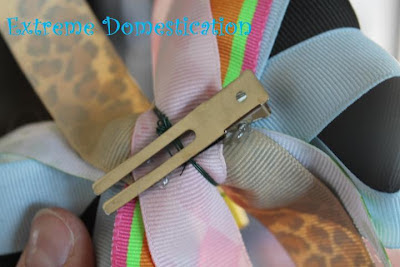
17. Fluff all layers of the bow to separate the colors. I put a dot of glue towards the center wire to keep the layers apart, otherwise they will want to go back to overlapping each other. The finished bow:

18. Glue a rhinestone to the center of the bow.

19. Snip a small piece of elastic and glue it to the hat so you have something to attach your bow to the hat with.

20. Glue a long piece of elastic to the bottom of the hat towards the ends.

21. Coat the top with Elmer's glue and cover with glitter. You can also use rhinestones or mini flowers if desired.