Monday, December 5, 2011

Swirly Lollipop Napkins

I went to the Christmas Idea House last weekend, which is put on by the Desert Club. The Desert Club is a women's group that decorates a mansion every holiday season with Christmas decorations and baked goods. The proceeds go to charity or are awarded in scholarships. I received a scholarship when I was in high school.

Anyway, I saw these adorable striped wash clothes there that were twisted and made into a lollipop. What a cute idea right? So I thought this idea would be great on a tabletop with striped napkins. It literally took me 10 minutes to do 6 napkins. SO easy.

You will need:

Striped napkins

Plastic bags, gallon size, no zipper
Popsicle sticks

Green floral wire

Scissors

Decorative tie or ribbon

Beads or ornaments to attach to the final product (optional)

1. Start rolling the napkin from the corner
2. Start forming a swirl, twisting as you go. Don't twist too tight or too loose.

3. Secure the end to the rest of the "lollipop" with a small piece of wire


4. Cut off about 40% of the bottom of one bag and wrap around the lollipop like a wrapper. Put the Popsicle stick in the bottom and secure with a decorative tie.

The finished product is not meant to stand upright because the stick is not securely attached to the lollipop. After all, your guests are just going to take it apart to use the napkin :)You can add a large bead or a mini ornament for extra sparkle


The napkin will be a cute addition to your table


These are matching candy ornaments attached to my chandelier


Here is some ribbon attached to chair backs along with an ornament (all from Hobby Lobby)


Merry Christmas!

Friday, October 7, 2011

Red Velvet Ghost Truffles

I recently had some really yummy truffles and I started thinking about other combinations I could make. Because I am obsessed with red velvet lately. I decided to make some delicious red velvet truffle ghosts for Halloween. They are so easy to make with only three ingredients and no baking.


You will need: red velvet cake mix, 1 block of cream cheese (8 oz.), and candy making chocolate in vanilla, wax paper for cooling

1. Make red velvet cake as directed


2. Bake cake and cool completely

3. Pull apart the whole cake and put in a mixing bowl with the softened block of cream cheese (only a small piece of cake pictured here)

4. Your final mixture will feel like a really moist play-doh.


5. Form cake mixture into 1 inch balls. Start melting your chocolate in the microwave

6. Dip each ball into the melted chocolate and place on wax paper.

7. Put truffles into freezer overnight to harden

8. You are left with some simple, yummy truffles perfect for parties


I added some ghost faces with regular candy making chocolate to create cute little ghosts
Happy Halloween 2011!

Friday, September 23, 2011

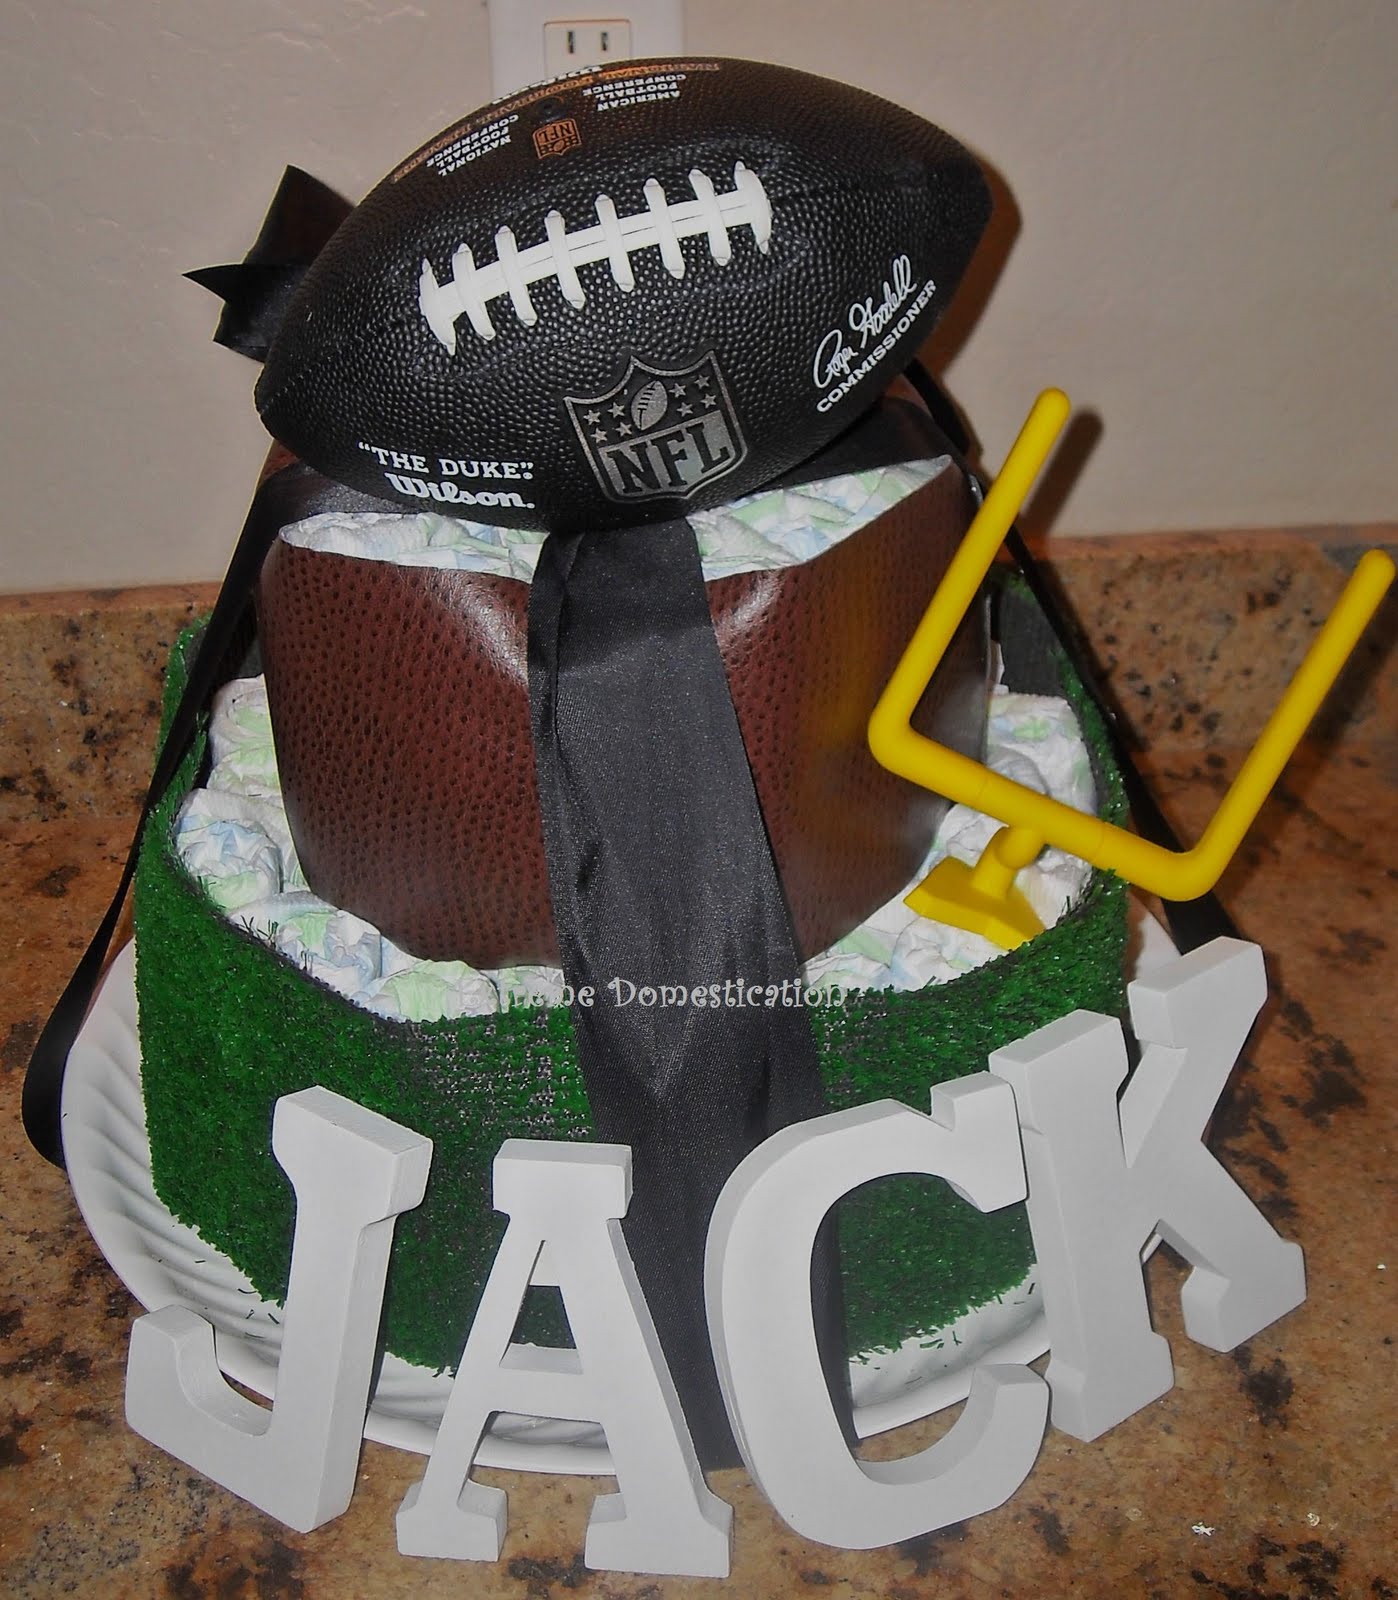
Touchdown Diaper Cake

This diaper cake is great for someone having a boy who is a football fan. The craft was so fast to make also. I love boy stuff because it can be so much simpler.

You will need:


Diapers


leather fabric (about 6" wide)


grass rug


hot glue


ribbon


football


plastic tray


wood letters


rubber bands


yellow goal post was from a Sonic kids meal


1. Roll up a diaper and cut the grass rug the width of the diaper. Glue the ends you cut together to form a circle


2. Rubber band 4-5 diapers together at a time and start filling up the circle.


3. Cut the leather strip next. Make it shorter in length than the grass strip.


4. Hot glue the ends of the leather circle together. Stuff the leather circle like you did the grass one.


5. Put the stuffed leather circle on top of the grass circle and place on the tray. Tie the whole thing together with a ribbon.


6. Place your letters around the cake. I didn't glue them to the cake so the gift recipient can use them later.


7. Place your footbal on top (I didn't glue that either). Then tie on any other embellishments you wish such as binkys, baby combs, socks, etc. Finished!


Saturday, September 17, 2011

Cheery Cherrio's Hair Flower


Recently, I saw a boutique that had hair clips made out of soda cans. I was thinking and thinking how I could make those without slicing my fingers off and I finally decided to do something a little safer! Cereal boxes are probably already present in your pantry and with a few extra items, this craft is cheap and easy.


You will need:


Cereal box

scissors

hot glue

felt

hair clip

Modge Podge

Button or rhinestone for the center


1. Draw a template petal to trace around for all of your other petals, then cut it out.


2. Start tracing on the backside of the box. Make sure to place your stencils over the logo or whatever else you want to capture.


3. Cut out all of your "petals."


4. Cut out a circle from your felt for the backing. Start hot gluing each petal to the felt in a circular fashion. Make sure to overlap the petals slightly and alternate between really busy petals with really plain ones.


5. Keep gluing!


6. Glue on a second row of petals


7. Modge Podge over the entire flower. This gives the flower a shine and protects it from moisture and tearing.


8. Hot glue on your centerpiece. I picked a simple button so the focus would be on the Cherrio box


9. Glue your clip to the back using a small strip of felt to glue it down


10. Clip in and enjoy!


You can use any color combination for different holidays:


Reece's Puffs + Wheaties FUEL= Halloween

Cocoa Puffs + Reece's Puffs= Thanksgiving

Apple Cinnamon Cherrios + Captain Crunch + Special K(white box) = Christmas

Special K + Captain Crunch = Valentine's Day

Frosted Flakes + Fruit Loops+Special K= July 4th


The possibilities are endless, so have fun!
Related Posts with Thumbnails